Part 4: How to use EF Core with MongoDb in Blazor Server Web Application

In part 4 of the series, I'm going to show you how to use EF Core with MongoDb in Blazor Server Web Application.
Articles in this series:
- Part 1: Getting started with Blazor Server Web App Development using .NET 8
- Part 2: How to implement Microsoft Entra ID Authentication in Blazor Server Web App in .NET 8
- Part 3: How to implement Multilanguage UI in Blazor Server Web App in .NET 8
- Part 4: How to use EF Core with MongoDb in Blazor Server Web Application
- Part 5: How to show Dashboard with Radzen Bar and Pie Chart controls in in Blazor Server Web App
- Part 6: How to support Authorization in Blazor server web app when using Microsoft Entra ID authentication
- Part 7: How to implement Radzen Grid Control with dynamic paging, filtering, shorting in in Blazor Server Web App
- Part 8: How to implement Data Entry form in Blazor server web app
- Part 9: How to use SignalR to show real time updates in Blazor server web app
Entity Framework Core (EF Core) is a popular Object-Relational Mapper (ORM) framework for .NET applications. While primarily designed for relational databases, it has expanded its capabilities to support NoSQL databases, including MongoDB. This article will guide you through the process of using EF Core with MongoDB in your .NET 8 projects
Introduction
Before diving into the code, it's crucial to understand the nuances of using EF Core with MongoDB. Unlike relational databases, MongoDB is a NoSQL database, meaning it doesn't adhere to the traditional table-row structure. This introduces certain limitations and differences in how EF Core operates with MongoDB compared to relational databases.
In Part 1 of this series, I've explained the development environment setup for this article, that I will repeat here for the users who have not gone through it.
Before we start
In order to follow along with this articles, you will need:
- .NET 8 SDK and .NET 8 Runtime installation
- If you are planning to use Visual Studio 2022, make sure you have all latest updates installed (v17.8.2)
- Install MongoDb Community Server, MongoDb Compass, and Mongodb version of Northwind database (Covered in this blog)
- You may need Microsoft Azure (trial will also work) to setup Entra ID App in Azure and configure it to use
If you are fan of command line tools or want to know more about the tooling, see ASP.NET Core Blazor Tooling
How to setup MongoDB for development on windows
If you are not familiar with setting up MongoDB for development on windows, here is a quick walkthrough of what you will need:
- Go to MongoDB download center and download MongoDB Community Server MSI package and install.
- Next you will need MongoDB compass MSI and install it. You will need this tool to connect with your MongoDB Community Server and do the database administration related activities. If you are familiar with Microsoft SQL Server world, MongoDB compass is like SQL Server Management Studio of MongoDB world.
- Next, download MongoDB Command line Database Tool which we will need to import an existing sample database.
- We will be using a sample existing database called Northwind that I've downloaded from here
Import Northwind Mongodb Database
- Open MongoDB Compass and connect to localhost:27017 which is a default port when you install MongoDB Server on windows.
- Click on the databases in the left navigation and create a new database with name northwind and collection sample.
- Go to github repository here in your browser, click on code in the top right and then download zip menu to download the zip file.
- Extract MongoDB command line database tools zip file
- Open mongo-import.sh inside the root folder and change the mongoimport keyword with the actual full path of mongoimport.exe that is part of MongoDb command line database tools zip file. The resulting line will look like below:
"C:\temp\import\mongodb-database-tools\bin\mongoimport" -d "$1" -c "$collection" --type json --file "$file" - Open command prompt and go to root folder where you have mongo-import.sh file and run command ./mongo-import.sh northwind
- If everything is done correctly, you will see console message that displays the json file name and the number of documents imported.
- If you switch back to MongoDB Compass, select northwind database and click on the refresh at the top right corner of the sidebar, you will see collections like customers, employees etc.
We are going to use this sample database to build something interesting that makes sense and has a real-life use cases instead of just a sample table with a few fields.
Setting Up the Project
Create ASP.NET Core Blazor Server Web Application
- Start visual studio and select create new project.
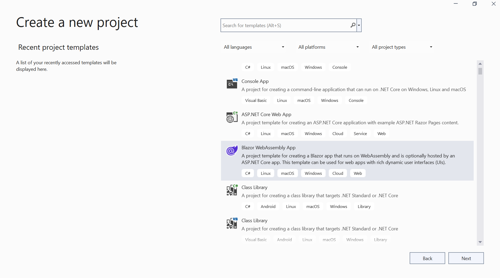
- In the Create a new project window, type Blazor on the search box and hit Enter.
- Select the Blazor Web App template and select Next.
- In the Configure your new project window, enter BlazorAppPart4 as the project name and select Next.
In the Additional information window, select .NET 8.0 (Long Term Support) in the Framework drop-down if not already selected and click the Create button.
- Build and run the application once so that you have your application url that you can copy from the browser and save it for later.
Add the nuget package
Open Tools > nuget package manager > Nuget package manager console and type following command:
This will install all the necessary files needed for accessing northwind database that we created in MongoDb using Entity Framework Core Code First.
Add Model for Customer table
In the example northwind database, there is already a customers table with some data in it. We are going to display the first name and last name of the customer. So, let's create a folder in the root called Model and add new file called Customer.cs that contains following class definition.
Create Entity Framework Core AppDbContext class
Next, we are going to create a new class called AppDbContext that inherits from DbContext class of entity framework core. Add another cs file called AppDbContext.cs in the models folder and paste following code.
Create Customer Repository
Next, we want to use repository pattern to ensure data access code is separate and testable. Add another folder in the root of your project called Repositories and add a new cs file called ICustomerRepository.cs with below code:
Once you are done, add 1 more file called CustomerRepository.cs with below code:
Create AppSettings.json settings
The AppDbContext context will require MongoDb connectionstring and database name. It is recommended to create an application wide setting section in the AppSettings.json. Open your AppSettings.json and 'AppConfig' section from below. I'm showing my full AppSettings.json file for your reference:
Create AppConfig class for settings
Add AppConfig.cs class in your project and then add below code in the class definition:
Configure Dependencies in Program.cs
Next, we want to configure dependency injection so that Repository and AppDbContext classes that we created in our project can be injected where required. Here is my Program.cs:
Please note on line 13 above, we are reading our AppSettings.json section called AppConfig and then convert it to AppConfig class object. On line 18, we are configuring Entity Framework Core MongoDb data access connection string. On line 21, we are resolving the customer repository. The other part of the file has no changes.
Show customers
And finally, open Components/Pages/Home.razor and replace the content of the file with below:
Here is the output of the whole exercise

Conclusion
In this article, we covered the step by step tutorial of How to use EF Core with MongoDb in Blazor Server Web Application of the blazor web app development series.
Ready to unlock the full potential of Blazor for your product development? Facile Technolab, top Blazor Development Company in India providing Blazor development services can help you bring your vision of product mvp to reality.


Comments
Post a Comment